

Hypothesis: There is no holiday that can’t be improved with power tools. To test this hypothesis, we purchased The Pumpkin Gutter. (You can get one here.)
I enjoy having carved a pumpkin, but I do not like actually carving them. Mostly because I don’t like sticking my arm into the pumpkin to scoop the guts. Unfortunately for me, this is the most time consuming part of pumpkin carving. Thankfully this carving tool amounts to not only a shortcut, but almost completely eliminates the arm-in-pumpkin aspect.

I actually put a note on my calendar to buy one for this year, so I wouldn’t have time to lose it or forget its existence by Halloween. And buy one I did, and today the Dudes and I put it through its paces. My precious cordless drill was invaluable, but you can use any drill. Remember you also need to use safety glasses and work gloves. This particular activity is not horribly dangerous as power tool usage goes, but there is no such thing as modeling proper safety procedures too often.
I also realized, belatedly, that to really take my pumpkin geekery to the next level, I should have acquired a set of carving tools like this one:

The loop tools would help with the detailed bits. If we aren’t careful, I’m going to start liking this activity altogether.
See The Pumpkin Gutter in action:
Some notes on technique: I prefer to work from left to right, and top to bottom, doing the quarter of the pumpkin I can see well and then giving it a quarter turn to move onto the next section. Joy Makin’ Mister prefers to go from top to bottom, moving back and forth over the area that he can see. The kids technique seems to be mostly based on splattering the guts as far as possible.
Which is also worth mentioning. There will be splatter. Plan accordingly.
The instructions mention that sometimes innards will tangle around the gutter. This is true. Just remove the cutter from the drill and turn it upside down. The tangled mess will slip right off the shaft of the gutter attachment. (I insisted on wiping it down with a paper towel before returning it to the drill, because I like my drill and I’m not sure pumpkin is what it needs.)
My driver has a light that comes on when you pull the trigger. This feature was really helpful. You may want to have someone hold a flashlight for you, or to wear a headlamp to direct light down into the pumpkin. They are perfectly shaped to cast shadows on all the parts you really need to look at.
It was also observed that it would be possible to go overboard and burn right through the side of your pumpkin. It’s hard to imagine doing this by accident, but it’s something to keep in mind.
This year’s Amazing Pumpkin Carving Templates
No holiday would be complete around here without some appropriately themed geekery, so naturally we have a “greatest hits” roundup on our jack-o-lantern collection. The pumpkin gutter has inspired me to try some more technically difficult designs this year, since I am not sick of the whole process before it starts. Our choices were:
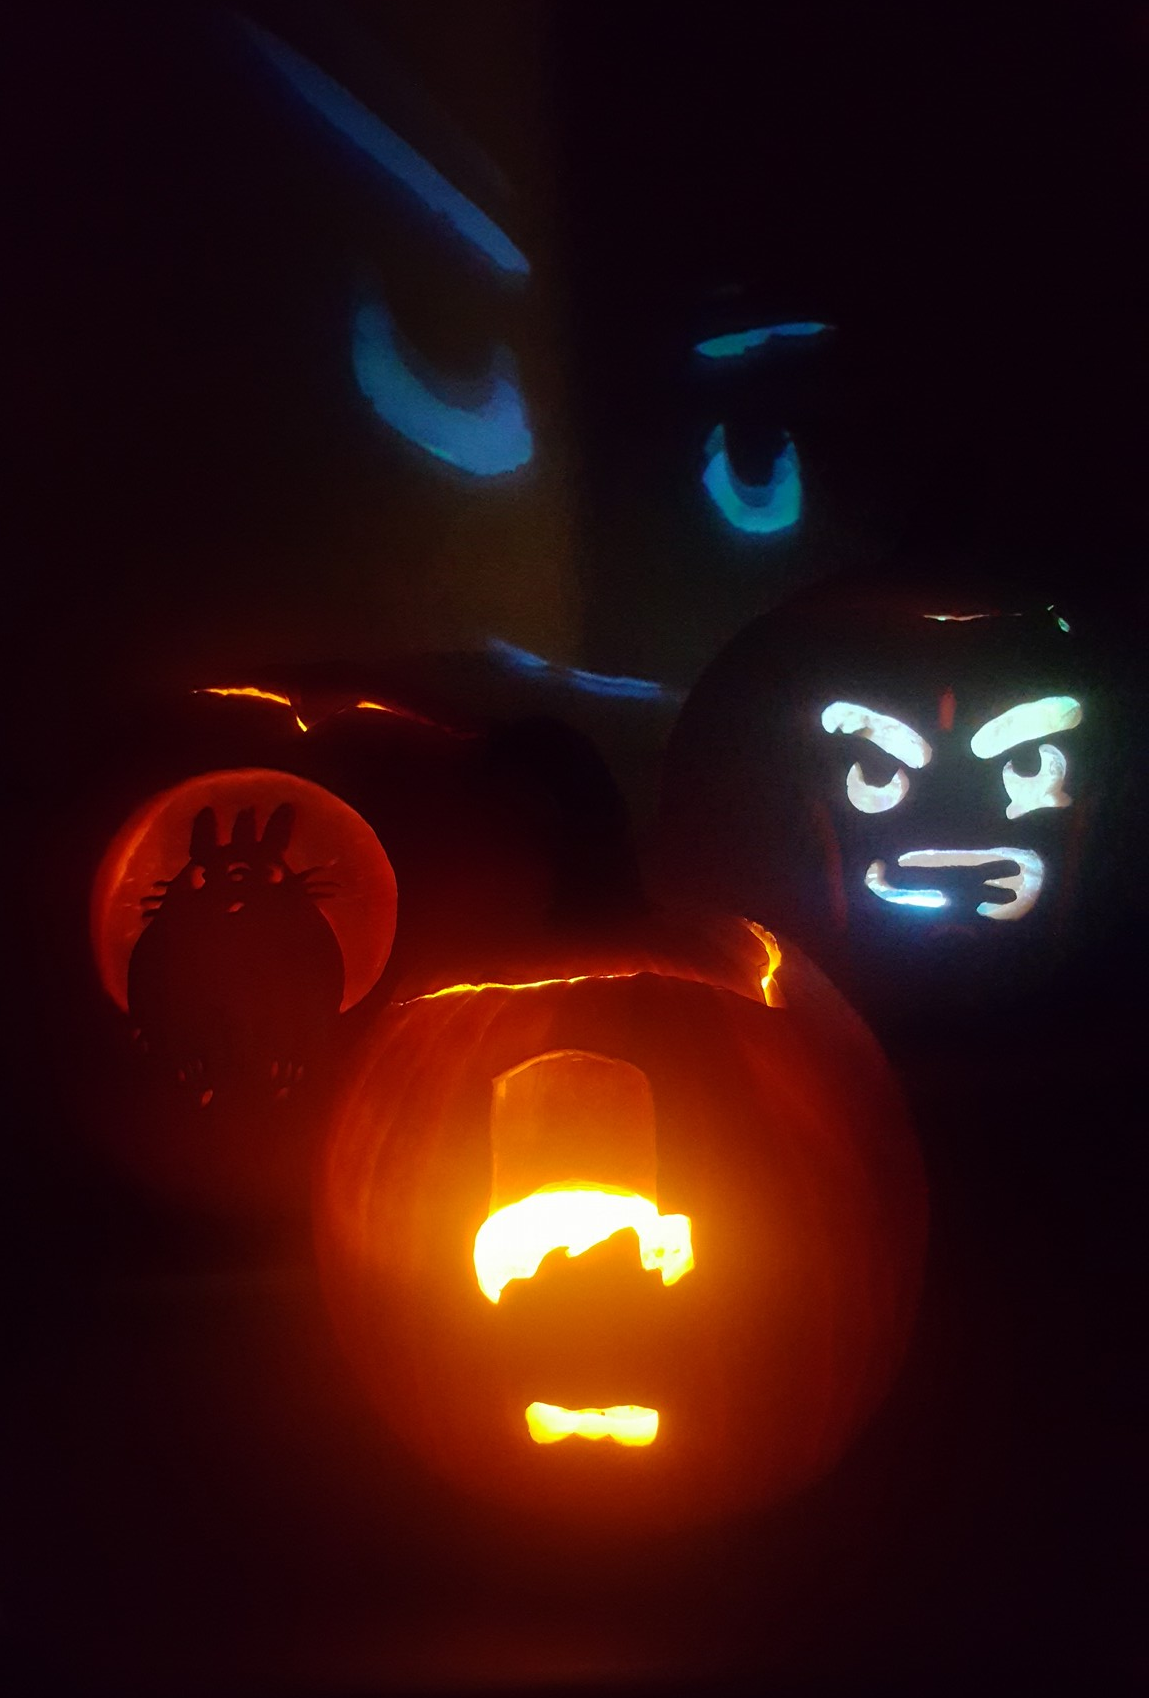
- A Totoro template you can find here. (Why yes, we did have to watch the movie again once I showed the boys the template. HOW DID YOU KNOW??!?)
- Fezzes are cool because I had to.
- Lego Head Template for my Lego Superfans. You can see this face reflected on the wall behind our pumpkins. The “angry lego face” on front was a special request. Please don’t blame anyone for the template, I created it off the cuff to make my kid happy.
How to make sure your pumpkins make it to the big day
Don’t forget battery operated lights for your pumpkins. (Safer, and the pumpkin doesn’t get “cooked,” which should help with the longevity.) I know the internet contains literally hundreds of tips on how to make sure your pumpkin lasts until Halloween, but some of them can actually speed the decay of your pumpkin. Read this comparison of popular preservation methods for more information. We went with a bleach spray (Target’s generic version, less than $2) and a desiccant (Fresh Step Crystal kitty litter, in our case. Make sure it’s the CRYSTALS, not the clay) inside our pumpkins. Unfortunately we didn’t start right away, but we are hoping that the triage is enough to get us over the finish line and have something to display for Trick or Treaters. Cross your fingers for us!
This post contains affiliate links. Using my affiliate links costs you nothing, and generates a small commission that helps keep this site online. Thanks for using my affiliate links.
